The new box joint jig is done! I finished it last night. But it was too late then to do a posting, so I'm doing it now and adding a couple of extra notes after a day of thinking about it and tonite's tests.
Last night was all about completing the adjustment section. This involved drilling holes in the end grain of the fence and one of the sliding adjustment pieces and then assembling the hardware to make it all work.

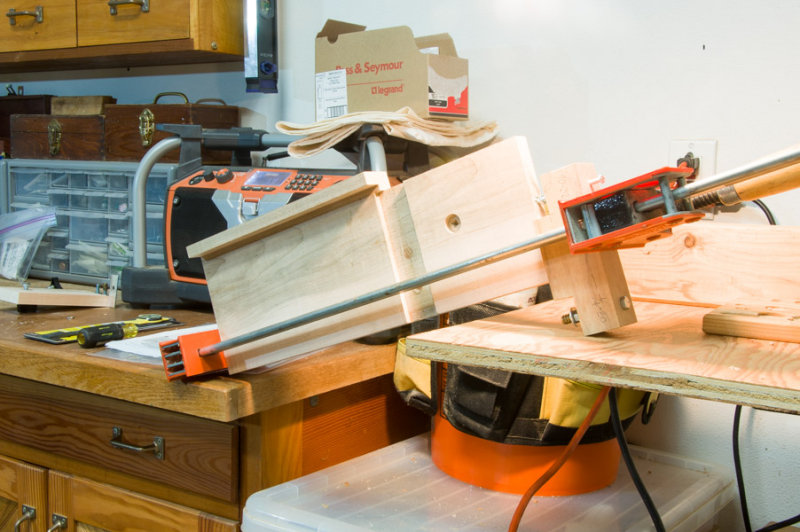
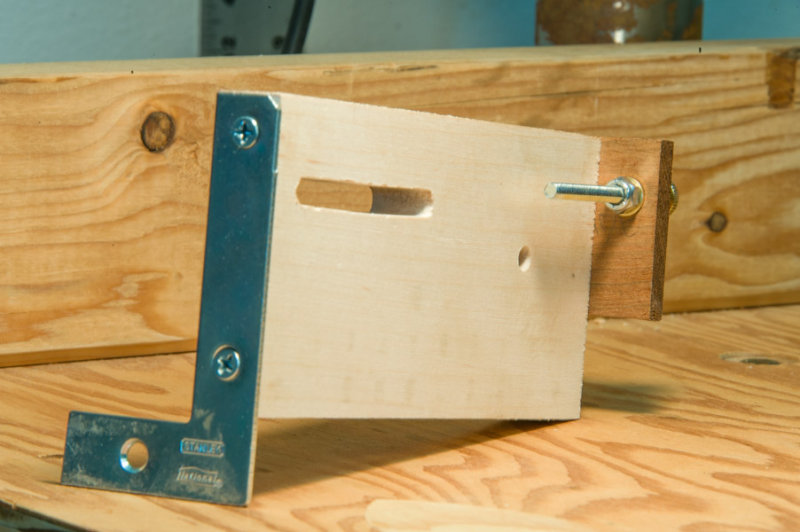
Drilling for the adjustment screws had to go a full 2 inches into the end grain. Doing this on the short adjustment piece was easy to do on the drill press. I used the little right angle support I made and clamped everything down. But I couldn't do the same thing on the fence because it's too long and my bench top drill press doesn't have the length. So I had to improvise. Eventually I came up with the idea below to "sandwich" a pre-drilled block on the end of the fence with a couple support pieces on each side. I put the whole thing in the clamp on my bench and just took a shot with a hand drill. It actually came out straighter than the the hole done on the drill press!

I used a brad point bit and aligned it before securing the block. Then I just went for it. :) No guts, no glory they say. I used this same idea long ago when drilling holes for my futon sofa. So I knew it would work.
Then it was time to install the threaded inserts. A lot of woodworkers have trouble with these because they do have a tendency to follow grain and get crooked. You definitely can't install them free hand. You need some method of keeping them straight. Some folks will use the drill press. But for years I've used a simple little wooden block idea I found somewhere. All it is is a pre-drilled hole with a bolt and nut that secures the insert and keeps it completely vertical. Then you just screw it in. I like to wipe a generous portion of paraffin wax to lubricate the screws no matter what. And that helped installing these in hard maple. I didn't even use the jig to install them the full depth either. Once they were about halfway in I finished up with a large screwdriver.
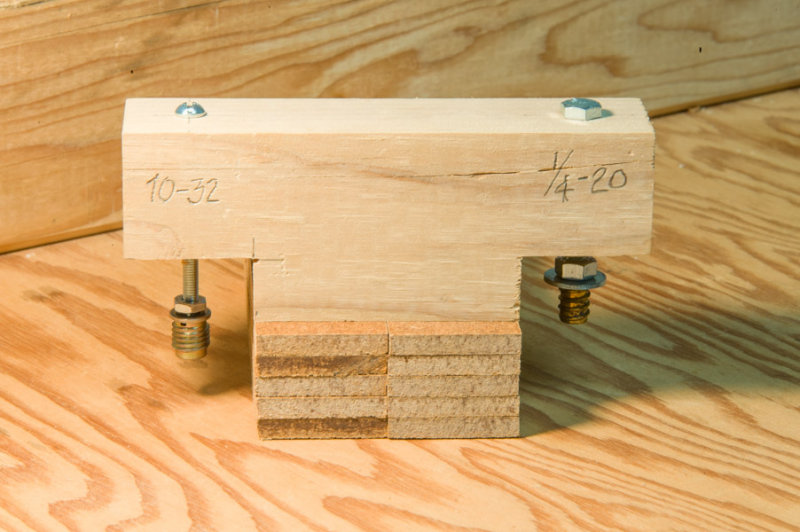
The inserts for the adjustment screws used the 10-32 side of the jig. The 1/4-20 side was used to install the inserts that connect the system to my Incra miter slot sled. The fence section again called for a little innovation. I clamped everything up in one of my cabinet clamps and drove the insert home.
But the worst part of the night... and the longest... involved installing the hardware on the adjustment end cap! On the back of the cap the screw is secured in position with a lock nut and washer. On the front is a washer, nut, and knurled knob. It took for-freaking-ever to screw the lock nut the 2+ inches up the threaded rod given the short work space. And then it took me a while to figure out how to lock everything down so it wouldn't just rotate the rod and not move. This one of those things that involves a lot of trial and mostly error. By the time you get done it's easy, but by then a couple hours have miserably passed.

I was so happy when this part was done. Now, I thought, I can put this thing together! It's getting late! Hold on, Cowboy! Not so fast. It wouldn't go together without backing out the lock nut on the outside screw! There went another hour. But even that ended. It was 11:00p. I never thought what was left would take this long!
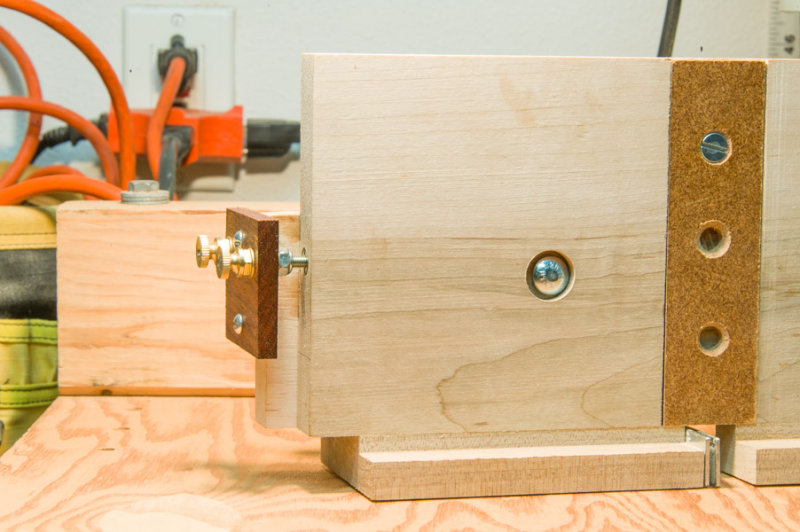
 The fully assembled and installed adjustment 'engine'.
So with that all done, I cleaned up and went to bed. Tonight I drilled and installed a pair of inserts on the back of the box joint jig fence. This will let me take the rig on and off my Incra miter gauge using machine screws and not mess up the wood over time with wood screws.
And then it was time to test it all with a brand new Freud SBOX8 Box Joint Blade Set. This was really the whole reason I'd built this jig. What a bust this turned out to be. And you can see why in the photo below.

The blade set consists of two blades with flat tops that are supposed to be able to cut either 1/4" or 3/8" fingers. The 1/4" cuts were perfect, but the 3/8" cuts were badly misaligned. The gap seen here is a little over 1/32" and completely unacceptable. So I'll return the blades next week for a full refund. I don't think I even want to try this with another set and will use either my router with the new jig or my existing dado stack. Testing with those will happen this weekend. It's too bad the dedicated Freud system didn't work. But I can't keep it the way it is.
Last night was all about completing the adjustment section. This involved drilling holes in the end grain of the fence and one of the sliding adjustment pieces and then assembling the hardware to make it all work.
Drilling for the adjustment screws had to go a full 2 inches into the end grain. Doing this on the short adjustment piece was easy to do on the drill press. I used the little right angle support I made and clamped everything down. But I couldn't do the same thing on the fence because it's too long and my bench top drill press doesn't have the length. So I had to improvise. Eventually I came up with the idea below to "sandwich" a pre-drilled block on the end of the fence with a couple support pieces on each side. I put the whole thing in the clamp on my bench and just took a shot with a hand drill. It actually came out straighter than the the hole done on the drill press!
I used a brad point bit and aligned it before securing the block. Then I just went for it. :) No guts, no glory they say. I used this same idea long ago when drilling holes for my futon sofa. So I knew it would work.
Then it was time to install the threaded inserts. A lot of woodworkers have trouble with these because they do have a tendency to follow grain and get crooked. You definitely can't install them free hand. You need some method of keeping them straight. Some folks will use the drill press. But for years I've used a simple little wooden block idea I found somewhere. All it is is a pre-drilled hole with a bolt and nut that secures the insert and keeps it completely vertical. Then you just screw it in. I like to wipe a generous portion of paraffin wax to lubricate the screws no matter what. And that helped installing these in hard maple. I didn't even use the jig to install them the full depth either. Once they were about halfway in I finished up with a large screwdriver.
The inserts for the adjustment screws used the 10-32 side of the jig. The 1/4-20 side was used to install the inserts that connect the system to my Incra miter slot sled. The fence section again called for a little innovation. I clamped everything up in one of my cabinet clamps and drove the insert home.
But the worst part of the night... and the longest... involved installing the hardware on the adjustment end cap! On the back of the cap the screw is secured in position with a lock nut and washer. On the front is a washer, nut, and knurled knob. It took for-freaking-ever to screw the lock nut the 2+ inches up the threaded rod given the short work space. And then it took me a while to figure out how to lock everything down so it wouldn't just rotate the rod and not move. This one of those things that involves a lot of trial and mostly error. By the time you get done it's easy, but by then a couple hours have miserably passed.
I was so happy when this part was done. Now, I thought, I can put this thing together! It's getting late! Hold on, Cowboy! Not so fast. It wouldn't go together without backing out the lock nut on the outside screw! There went another hour. But even that ended. It was 11:00p. I never thought what was left would take this long!
So with that all done, I cleaned up and went to bed. Tonight I drilled and installed a pair of inserts on the back of the box joint jig fence. This will let me take the rig on and off my Incra miter gauge using machine screws and not mess up the wood over time with wood screws.
And then it was time to test it all with a brand new Freud SBOX8 Box Joint Blade Set. This was really the whole reason I'd built this jig. What a bust this turned out to be. And you can see why in the photo below.
The blade set consists of two blades with flat tops that are supposed to be able to cut either 1/4" or 3/8" fingers. The 1/4" cuts were perfect, but the 3/8" cuts were badly misaligned. The gap seen here is a little over 1/32" and completely unacceptable. So I'll return the blades next week for a full refund. I don't think I even want to try this with another set and will use either my router with the new jig or my existing dado stack. Testing with those will happen this weekend. It's too bad the dedicated Freud system didn't work. But I can't keep it the way it is.
I'm late finding your review. You did an good job describing your work and the pictures were excellent. Sorry about the outcome with the blades. Have you found a fix?
ReplyDeleteI did find a fix, and it wasn't the blades after all. If you haven't found the posting on how I made this all better see this entry: http://2020heinsite.blogspot.com/2014/04/arbor-mods.html
ReplyDelete